How to Draw Hair: A Comprehensive Guide for Artists
Table Of Content

Afterward, fill in the shapes of the hair with varying lines to give it texture, volume, and depth. Next, add two thick locks of hair to frame the face. Start these voluptuous shapes at the hair part and move downwards in undulating, ribbon-like shapes. Starting a little above the hairline (or forehead), draw large petal-like shapes to create the bangs.
How to Draw Different Eye Types Step by Step
Similar to the first hairstyle begin by applying an initial series of strokes that will define the light, medium and dark areas of the hair. Again be sure to make these in a way where they flow along the shape of the hair. Negative space refers to the areas around and between objects. Next, start adding more details by defining individual hair strands. Remember that hair strands are not uniformly thick throughout their length. Use varying line weights to give your drawing a more natural look.
Cupcake Hair Buns: A Sweet and Whimsical Hairstyle Trend!
Simply keep drawing these lines to the final sections of the hair, following the guide arrows and reference images. Referring closely to the image in step 3, you can start drawing thicker lines to the left side of the hair. The reference image for step three has arrows to show you the direction that the hair will be flowing in the next few steps.
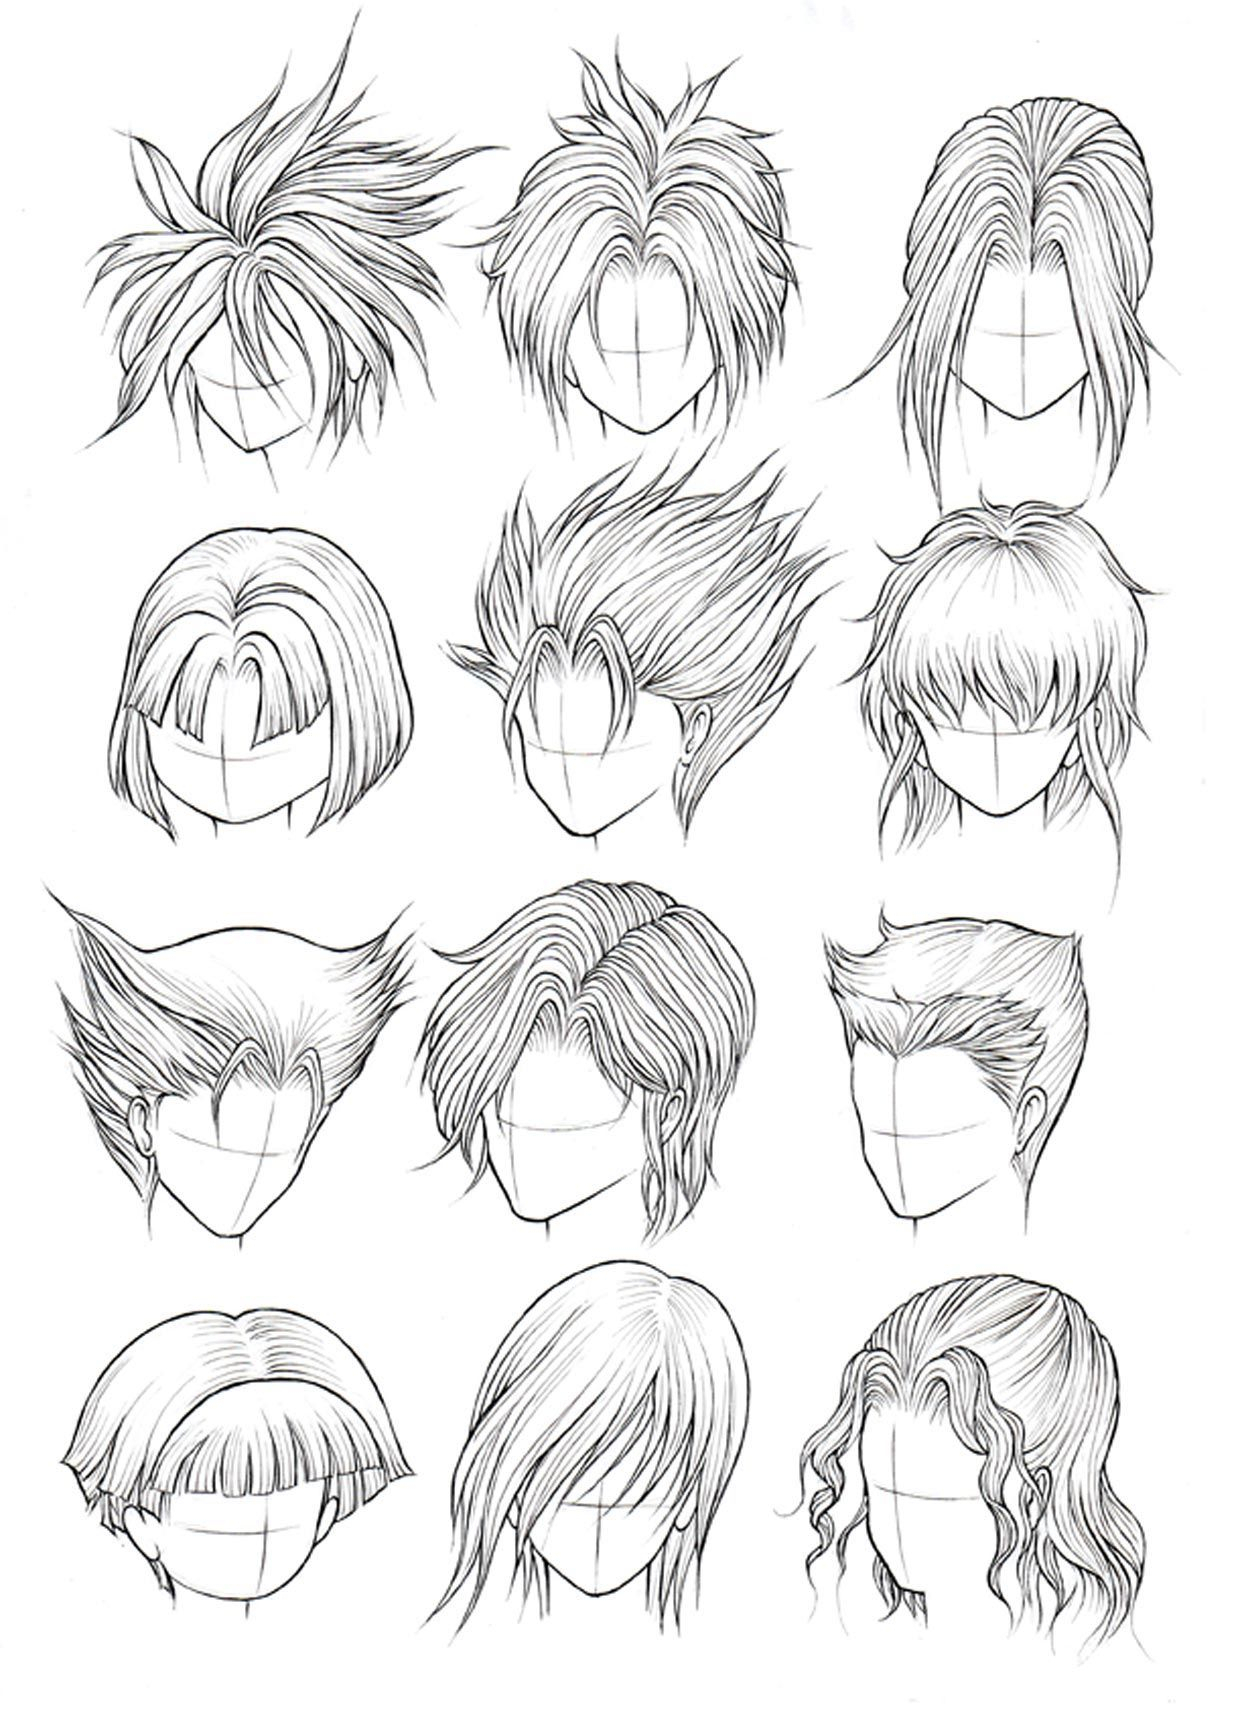
Drawing Demo Straight and Curly Hair
To achieve a realistic appearance, focus on creating volume and texture. Use shading techniques such as cross-hatching, stippling, or even blending with a smudging tool to add depth and dimension to your hair drawing. Finally, when you've fleshed out your sketch enough, it is time to go over it in ink. So, using your pen of choice (we recommend a technical pen, like Sakura Pigma Microns), slowly go over the lines. If you want to add some variation to the hair texture, then try mixing up your pens with broader and finer types.
With the powdered graphite and your brush, tap around the head to define the hair’s size and shape. Use significant circular movements to give it a “cloudy” effect. It’s what makes us unique and sets us apart from one another. It’s an extension of who we are and how we want to be seen. Hair has long been used to express oneself in various cultures around the world, and it continues to be a way to do so in our society too. I’ve always thought that short, almost shaved hair feels like a carpet!
Regina King Hosts SNL and Stars in Gorilla Glue Hair Accident Sketch - E! Online - E! NEWS
Regina King Hosts SNL and Stars in Gorilla Glue Hair Accident Sketch - E! Online.
Posted: Sun, 14 Feb 2021 08:00:00 GMT [source]
Afterward, add depth to the hair by adding numerous lines to each lock of hair. Shade the whole haircut now, drawing curls all around. Afro-textured hair has a lot of curly strands and texture. Draw the direction of the hair gently flowing down over the shoulders. Keep in mind that you're not drawing the single hairs here, just their flow.
So, choose a pen (or a couple of different ones) and trace over the graphite sketch. Afterward, it is time to fill in the hair with more texture, so add long and short lines throughout the hairstyle. Continue to fill in the hair with texture, adding more lines to the hairstyle to indicate volume. This is a part where you will want to refer very closely to the reference image as you draw. Try your best to draw the hair outline as it appears in the picture.
Jennifer Lopez Suffers Hair Malfunction While Performing With Latto & Redman on ‘SNL’: Watch - Billboard
Jennifer Lopez Suffers Hair Malfunction While Performing With Latto & Redman on ‘SNL’: Watch.
Posted: Sun, 04 Feb 2024 08:00:00 GMT [source]
Next, you may want to change the look of this realistic hair drawing by changing the style of the hair. This could be subtle and incorporate some of the existing stylings. When drawing cartoons, we simplify this even more and imply hair with hair shapes. They can be simple or complex, depending on the style of cartoon.
How to Draw Realistic Hair – Let’s get Started!
You’ve almost finished drawing the thin lines for your realistic hair drawing, and in this step you can finish this element off. Continuing on from the previous step, we shall draw more thick lines on the right-hand side of your realistic hair drawing. Slowly darken the drawing by applying more layers of overlapping strokes.
You should eventually have a line drawing with a good amount of details similar to the example above. If you are going to be follows this tutorial it’s best to do so using pencil and paper. Keep it lighter on the outside edge where the light comes through as well as where it grows out of the hairline. Repeat the steps above for the other side, although symmetry looks nice. The beauty of hair lies in imperfections and asymmetry, so try to keep both sides different. For this part, we’ll be using the diagram from section 1 and following the direction of the hair when pulled back.
Due to it’s various curves and folds curly hair will tend to have a much more random distribution of these. Finish the drawing by further darkening and smoothing out the overall shading. Finish the line drawing by adding the smallest set of details.


Comments
Post a Comment